Tuesday, June 25, 2013

What Do You Do When You Are Grounded?

What do you do when you are grounded? Why, create of course! I was supposed to be heading to our fair nation's capital last weekend but Wellington got hit with its worst storm in 45 years! My flight was cancelled which I was quite happy about in the end as the gale force winds registered at 200km an hour! Yikes! I was rebooked the next morning to fly to Palmerston North then bus down to Wgtn but I turned down that option. I can't really complain because there were people in far worse situations: no power, roofs missing, 2.5m snow in South Island etc).

The flight cancellation left me with a cleared schedule and the thought: what does one do when one is grounded? I made the most of my free time and read, caught up with friends who had 2 tickle monsters residing in their house, and created (of course).  A packet of Sizzix Diffusers (*cough*) may (*cough*) have arrived at my house recently (I admit nothing). I had to give them a try, right? I must admit I was a little bit at a loss as to what to fill the diffused bits with. I tried different techniques with each one. I ended up completely covering one with flowers and I thought: fat lot of use using the diffuser then! I really liked that card though and decided to make it for little Miss Sophie who turns 1 in a couple of weeks. Unfortunately I realised after I made it that if she is anything like her oldest sister (Miss 5), she will pull all the decorative bits off her first birthday card from me (true story!).  Also, I used a flag/pennant from a prize which is actually quite pointy and therefore dangerous to 1 year olds! Looks like you will be seeing me make a[nother] 1st birthday card on here soon :)

The other project I worked on was a mini album I completed the bones of over a year ago. It is a book for my youngest niece about our stories, our relationship, our photos along with words of wisdom.  All I needed to do was fill in the journaling.  I finally sat down to add some stories and pulled out PL type stamps to add words and phrases to photos and the journaling cards.  I intend on getting her to fill in cards too.  My cards are along the lines of: The story of ... and there is even one that says: I must really love you because.... and I added all the children's shows and movies I have sat through with her!

The album is a $2 one I got from Target in America. I've had it for years and I started making this at the end of 2011 I think!


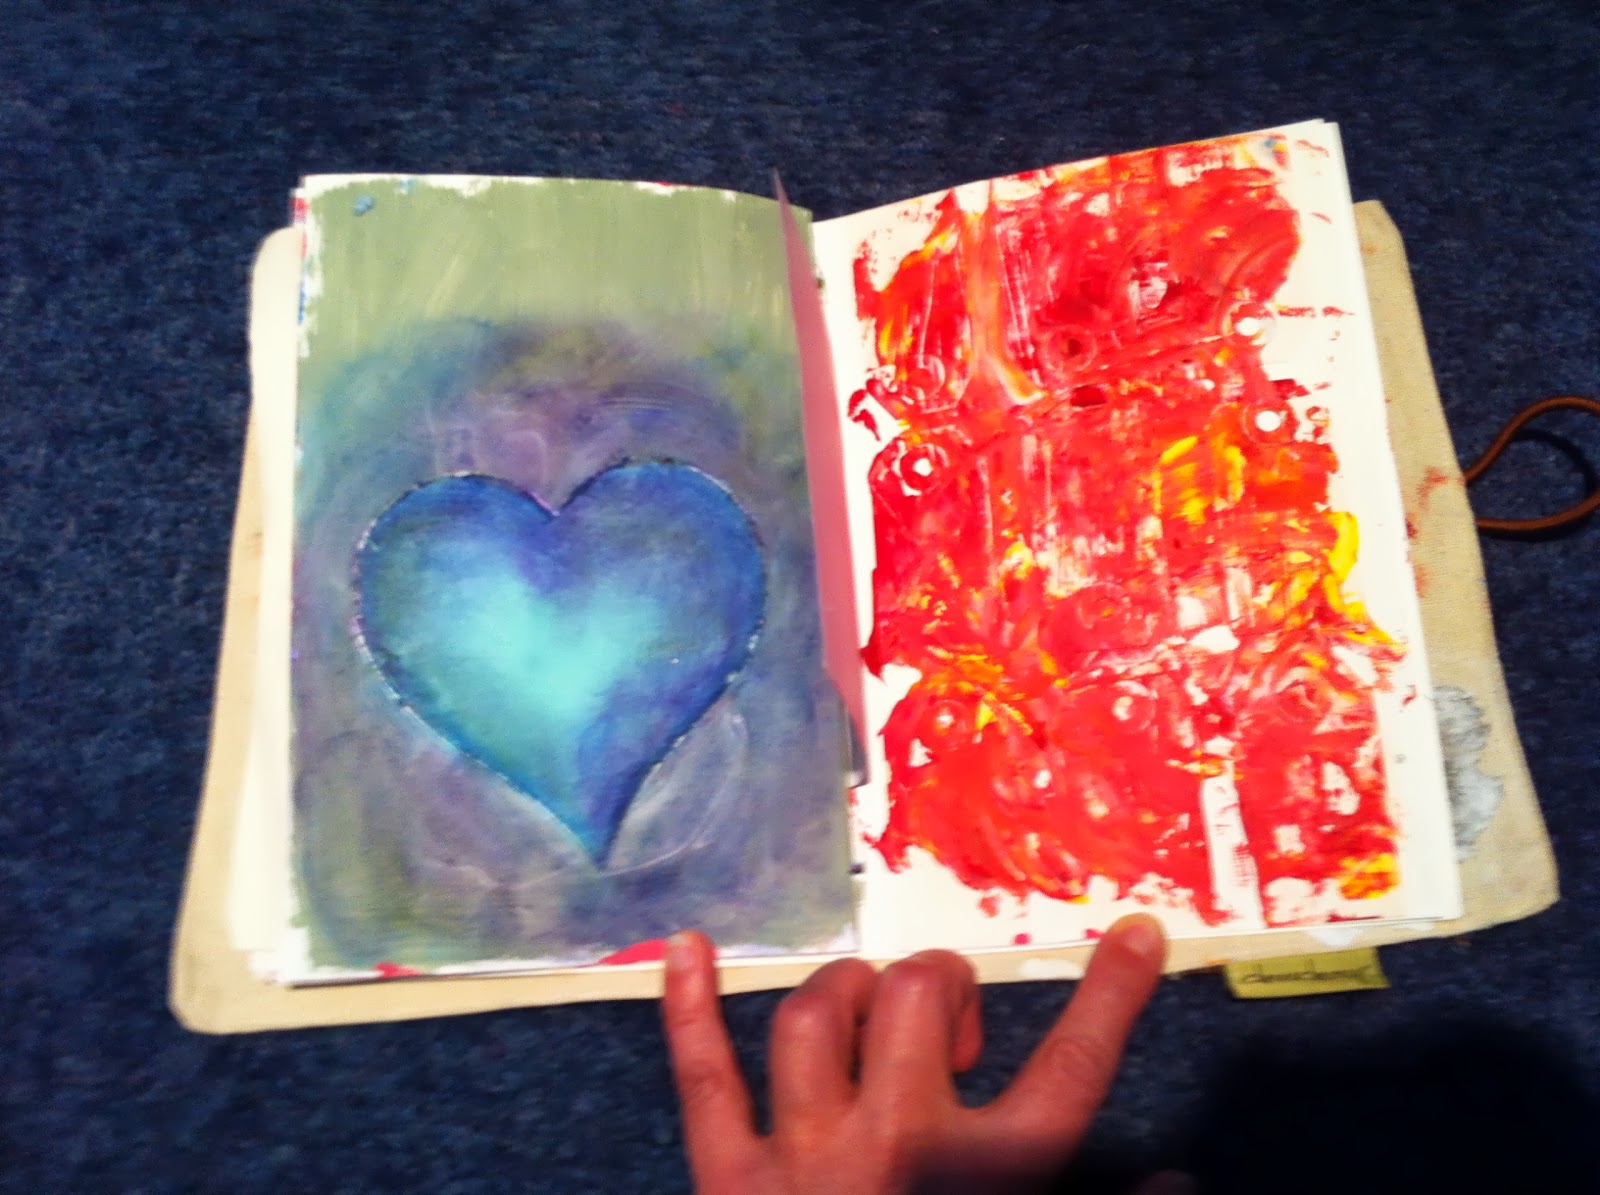
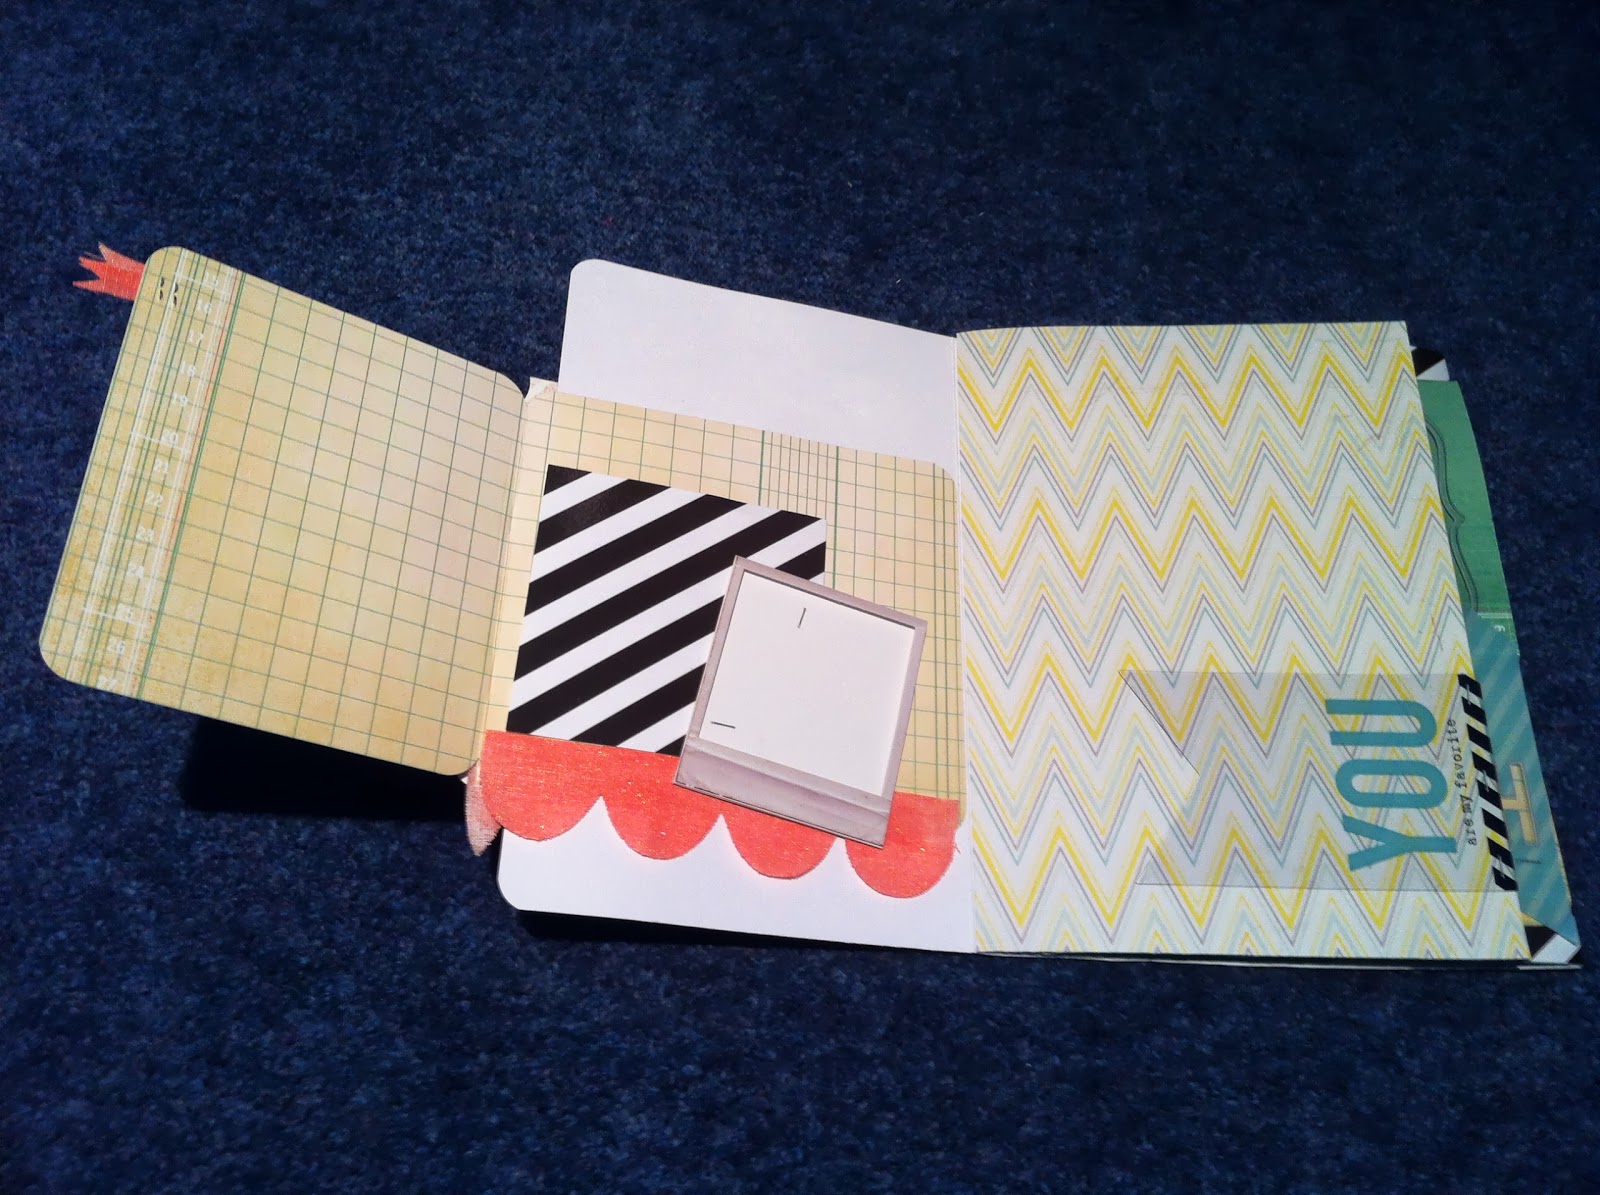
This is what it looks like now:


I used Tim Holtz tissue tape for the first time on this project and it started a love affair


I even went to the trouble of mirroring the title on the inside page - boy, I must really love her :) PS I did not dress her in the watermelon outfit! Her mother, my sister, did and it was just for fun. Honest.  Unfortunately, my niece's gorgeous auburn hair turned blond as she got older.


The album has paper bags in it that I embossed and inked. This might have been near the beginning of my love for Tim Holtz and his distress inks. Lots of BoBunny ETC range in this album and lots and lots of inking and stamping. Each double page spread has a paper bag (filled with photos and cards for journaling) and pockets.

You are forgiven if you are thinking that this book is a little masculine and not girly at all. Green is my niece's favourite colour so that was the base for the album and the BoBunny ETC range was very me (it's a book for both of us).

Seeing as I don't have pictures to load of the updated journaling I will let you in on the original funny story that was the impetus to make the book. The Story Of The Madarin: Eden (age 2) was asked if she would like a mandarin.  She said, "Yep!" and scrambled off her seat and ran to the back door. She opened the door, looked out and came back in saying: "She's not there". "Who?" they asked. "Aunty Manda" she replied. Turns out she thought they were asking her if she would like to let Aunty Manda in!

Cute, right? :-)

I will load pictures at some point it's just I am time poor now that my travel has been rescheduled for this weekend! Full on week of work after my time off then I'm off to SENZ for the day!!!! I am booked into a class run by Scottie Crafts in Auckland - they may also have been the enablers who provided me with the Sizzix diffusers (I admit nothing!)

If you made it to the end you will find out, not only a cute story about my niece, but also that I am entering this in Inspiration Emporium's June Challenge. The challenge is Something Old, Something New, Something Borrowed, Something Blue. Now, this album is quite old and I started it over a year ago. But, it is new because it is completely different to its original state (some may say it looked better before I altered it). I have used older product from my stash (metal charms, 'borrowed'  luggage lock, paint).  Unfortunately it is not blue.  I hope it fits their criteria - the details for the challenge are here . 

Materials: Album (Target), Paint (Making Memories), Tissue Tape (Tim Holtz), Ink (Tim Holtz, Stampin' Up!), Stamps (various - time poor!), RIbbon (Stampin' Up!), Papers and Chipboard(BoBunny), Embossing Folders (Cuttlebug), Mesh, Embossing Powder (Ranger)

Monday, June 17, 2013

Set The Timer!

Just to prove I can do cards quickly I decided to create a card based on the previous one I made and time myself.  I felt very rushed doing it under the pressure of the timer and, of course, when you are trying to be fast, things get in the way (draws close on your fingers and washi sticks to your scissors!).  From start to finish it took me 8 minutes to complete the card. If I wasn't so anal about inking the edges of things it would've been quicker. I just had to ink the edges of the arrows (with a stamping marker). It really did make a difference as they now look like they have some depth to them (as if they are cut from chipboard rather than just cardstock).I actually made two as you will see from the picture:


Apologies for the photo.  I did load a second one that is better but it still doesn't show them off very well. If I tilt my laptop downwards away from me then I can see the details on the bottom of the picture. Hope that helps - apologies if you have a PC!
 
So, in 16 minutes I have 2 cards for my stash - brilliant. Mind you, the 16 minutes does not include clean up!  I think I am getting a little bored with this sketch now; as I am sure you are. Time to look for a new sketch to work with methinks.

I am entering these cards in two challenges:

Simon Says Stamp n Show - Kraft. Kraft is the base for these cards and I took inspiration from one of the cards on their blog which had the combo of white ink on kraft.  The details are here .

Southern Girls Challenge - Give It An Upper Cut and Punch It Out. Their challenge requires you to use a punch or die cut. I used an arrow punch on my cards. The details for the challenge are here  .

Materials:
Kraft (Ormolu), Washi (7 Gypsies, Somi, other), White Cardstock (Stampin' Up!),
Arrow Punch (EK Success), Stamp (Kaisercraft), Ink (Stampin' Up!), Red Pen (Stampin' Up! - for inking the edge of the arrows).


Wednesday, June 12, 2013

Another Quickie

And I swear this card really did come together really quickly - 15 mins or so. That's really quick for me!

Remember this card from a while ago?


Remember me saying that this would be really quick to recreate with washi tape? Well, that's exactly what I did and it really was quick. This time I made it more masculine as it is for my Dad who had a birthday earlier this month. Here it is:


No arrows this time; I  had planned on using photo corners on their side as arrows but thought these gems worked better instead.  I have a confession on the card. I originally pitched the diagonal too high and the washi strips ended up too close to the top of the card. Thank goodness washi tape is so forgiving! I was able to carefully prise the pieces up and relay them on the card - and you wouldn't even have known if I didn't tell you.

I am entering this card in two challenges: A Blog Named Hero and Simon Says Stamp.

A Blog Named Hero's challenge is to make a masculine card -  the card is for my Dad so I'm sure it counts. The details are here  .

Simon Says Stamp's challenge is to make a card with a transport theme - the vintage cars on the washi tape count right? I hope so! The details are here  .

Materials: Kraft (Ormolu), Washi (Teressa Collins - grey, Typo - blue grid and argle, Somi - cars and vintage), Pearls (Kaisercraft), Stamp (Kaisercraft), Ink (Archival), Corner Chomper (WRMK).

Monday, June 10, 2013

Where Have I Been?

Where have I been? Why, at Creative Adventure Downunder of course! And it was awesome!!!!!!
Three days away with the BFF and 140 like-minded scrappers with 4 amazing tutors - how could we not have an amazing time?  The tutors were: Teresa Collins, Heidi Swapp, Donna Downey and Maggie Armstrong (from NZ). I will do seperate blog posts for all of the classes otherwise this post would use up your entire month's broadband data!

Over two and a half days we attended 6 classes and enjoyed a theme dinner on the first night. They arranged for a photobooth for us on the first night too so we could have pics taken on our own or with a person we came with (or connected with). The photos were then used in the layout designed by Maggie Armstrong.  Maggie also made a fab Ellen for the theme dinner and entertained us all.

The classes ran from 9am to 6pm (until 12pm on the Sunday) and we were all exhausted at the end of each day! Luckily the BFF and I stayed onsite at the Ibis and only had to walk to our rooms. The hotel supplied a buffet lunch for us which was amazing and I can't believe how much I ate but I tell ya, I needed the extra calories!

One of the reasons, apart from the fantastic classes and tutors, was the weekend away with the BFF. We haven't done that in years! Lots of fun and laughter was had and I was a tad worried we might even get kicked out on the first night (I swear no wine had been consumed at that point!). 

Keep an eye out for the posts in the next few days (can't promise I will get it all down today) for a quick *chokes on laughter* recap of each class.

Would you look at that. I managed to get all the classes recapped but they are in backwards order! Grrrrr! Should've started from the last class - who knew?

Day Three: Teressa Collins Travel Album

Our final class on Sunday morning was with the lovely TC again!  This class was definitely a bit of me as we made a travel album with various sized pages. I love that kind of thing and I added in extra bits n bobs to personalise it:


Pretty cool huh? next up: the inside pages.


This album I did manage to add photos to. I also had a mini journal album I had made previously for this surprise trip and I ripped it apart and used items in the album. They don't exactly fit but the journalling was already done so why redo it, right? Here's a picture of how it looks completed.


As a bonus, I managed to cut through some binding ribbon when I was punching the binding holes. TC said I was the first person ever (she really emphasised that word) to do this worldwide! Lucky me. She then said I really was her special friend - somehow I don't think she meant that in a good way?!?!?!

Day Two: Donna Downey Art Journal

Boy, this last class on Saturday was a biggie - 5 hours! To be honest I hit the wall about 2 hours before the class end time. I think it was a combo of tiredness and lack of acrylic colours which the class had to share. I stayed to the end but I didn't linger to finish anything in my journal. I did get a picture with Donna and her signature in my journal. The handmade journals she gave us are gorgeous! I wanted to keep it just as it was - not mar it with paint! Take a look:


The inside pages are simply white Bazzil cardstock and random items like envelopes. I love them!

This class was totally different for me. Funnily enough, the BFF thought this class was more my thing than hers and that I would be more likely to do the artsy thing again than her. Turns out, she enjoyed it more than I! For me, I took away that I learned about how colours work together (or don't) but in a way that I saw and will remember without actually attending a class on how colours work. 

Part of me is embarrassed to show the pages but the thing about the album is that it is a place to play and see how things work (or don't). It is not something to pull out and say: look what I made. I am tempted though to pull out the pages I used and add new, clean ones in (I told you I like the journal itself!). Here's the journal pages as they are:


Okay, I cheated! This is a stamp that Donna did in my album for me.


I'm going to label the second to last one: child in a highchair with a tomato and mustard :)

Day Two: Heidi Swapp Frame

The first class on Saturday morning was something I really like. We coloured a HS frame with glimmer spray.   Unfortunately we were running out of the tinsel colour to colour our frames as we were the last class to do this class. I managed to get hold of Georgia Peach colour and did a couple of light spritzes of that over my tinsel base as it will go with our decor (and I love bright colours). Unfortunately they sold out at the store (I had it in my hot little hand the day before but I didn't know how gorgeous it would look). Luckily, my LSS got some in so I raced off there as fast as I could as I wasn't missing out twice!


Here's pictures of the fold-out book inside - minus photos. I will add photos when I get time (I'm just trying to add one of the running themes in here).


That Georgia Peach colour on the scallop calico is gorgeous, no? So you see why some had to come live in my craft room.


HS was still funny but boy did she bring out the tear jerking stories!

Heidi Swapp: FIle Folders

The last class on the Friday was Heidi Swapp and we made two file folders. Heidi is such a laugh to listen to and she had us giggling most of the class.  The colours are different for me (I'm not a girly girl) but I really like the idea of the file folders and I think you will see them featured here in the future.


Yes, I haven't had time to add photos yet. Also, I have to find a piece that slots into the clear pocket in the second photo. O yeah, that photo is upside down too. Maybe it's time to stop blogging?

Teressa Collins: Layout

Our second class of the day on Friday was designed by Teressa Collins. Poor TC had only flown in that morning! She did great battling the jetlag and tiredness and was super lovely :) Her daughter is so cute too. 


Pretty cool huh? Next up is a shot with pictures added. I used random pictures I had of my nephews and nieces when I last went to visit theme. I did have to rip up the pennants on the first page otherwise they would've covered my nephew #1's gorgeous face.  You will also see I had to move the doily otherwise it would've covered nephew #2! BTW the numbers used refer to their birth order not  their ranking in my eyes. Gee, what kind of Aunty do you think I am?


The second page has 2 file folders with extra pictures inside. I made a flip up book inside the bigger one with some extra pics. Must add that photo in here (when I get time).

Can you recognise 2 themes here? Yup, file folders are all the range and I am going to say, when I get time, a lot!

Maggie Armstrong: Layout

Our first class on Friday morning was a layout designed by Maggie Armstrong and featured a kiwiana theme - there were a lot of Aussies and one Yank attending. Maggie specifically designed the file folder to look like a camera and held a place for the photo booth photos I mentioned in my recap. The BFF and I had fun with our time in the booth (the whole weekend really).


Excuse the peg sticking out of the top of the file folder. It originally had the brass feather on it but it does a great job of holding the file closed. One of the ladies I met used the leftover paua pieces and covered it with them and it looks fab. I plan on doing that too (when I get the time). Another lady placed another file folder inside with extra pics from the weekend - I might try and do that too if I can find/make a folder to fit. 

Here's a picture with the camera open:


The cool Create title was made with beeswax and pigments.  You should have seen the floor after this layout: feathers everywhere and a strong scent of honey in the air.