Monday, September 26, 2011

Sick of the Blue Background?


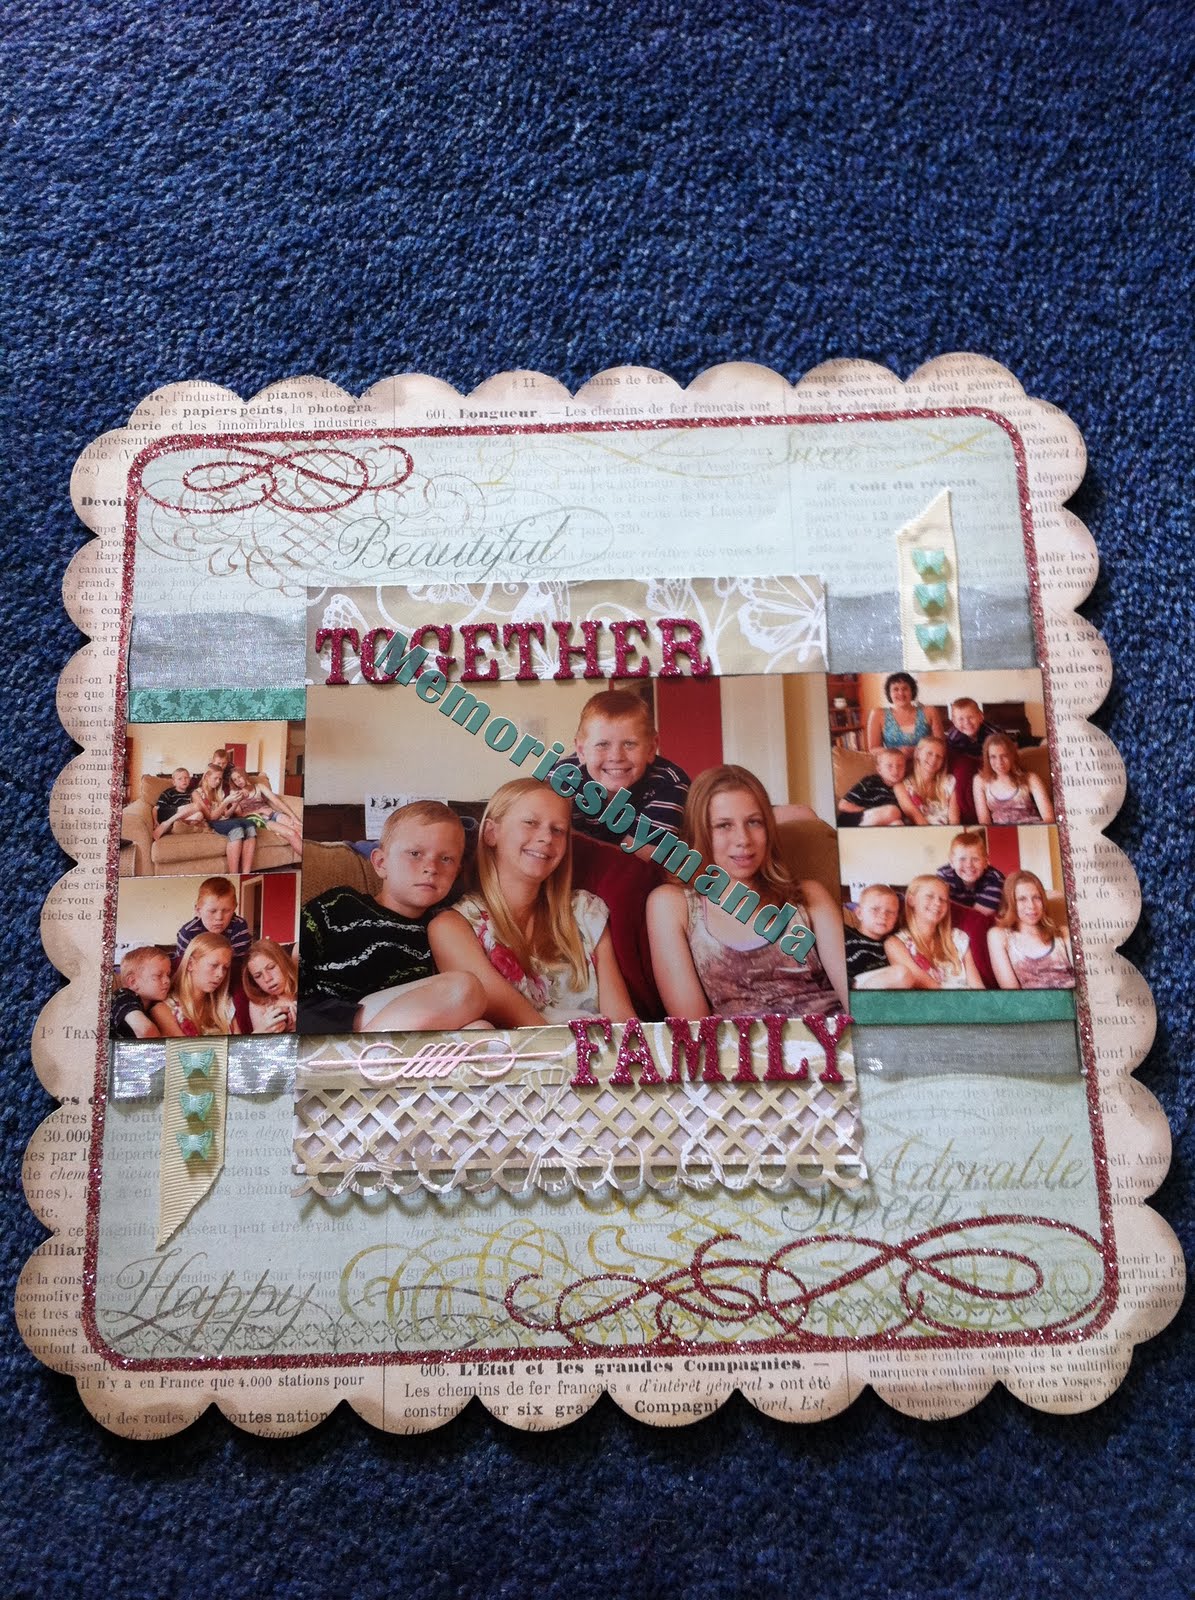
Sick of the blue background? Me too! So, for the picture of my latest creation I changed the photo shoot location. I created this layout based around the die-cut Bo Bunny paper and a swirl from Bo Bunny in my kit from Fiona. The swirl direction didn't suit the layout design so I flipped it over and spritzed it with Smooch. Again it is a very different style for me but I totally love it! I may have given myself RSI spritzing all the doilies and used up all of my favourite Smooch colour (the brown) but I think it was worth it.
Two tips I learned in the creative process:
The dark rectangle shape under the swirl is actually one of those [really old] metal word plaques - I just coloured it with Stazon ink to match my layout
I wanted to emboss the pre-printed ring on the die-cut paper but my embossing pens always run dry before I even have a chance to use them. I used a refill bottle of Versa Mark ink to dab ink around the circle and then smeared it carefully with a paint brush (I'm not sure the colour it came with matched but it was too late to turn back once it was done!).
My Mum got given a present in the presentation box and passed it on to me - score! I glued mini pegs inside it with glass glaze so I can display my latest creations in it.

Friday, September 16, 2011

The Next Installment for Create Auckland


The latest parcel has arrived from Fiona @ Create Auckland. I have already started mapping out my project[s]. It's arrival meant I had to clean off my scrap table from the last project I worked on! Clean slate and ready to go.
On a side note: I am booked in for a class Wednesday night at a local scrapbook shop. I am looking forward to attending and having the project already designed for me. It is a mini book by Kathy Kirsten and I will load a picture when it is done.

Monday, September 12, 2011

Here's a Couple I Prepared Earlier


These photos were taken while the kids were playing on my ipod - they did oblige me with a lovely shot with all eyes on the camera. I started out with a layout idea I wanted to scraplift from a recent CK mag but none of my mini pics were of the right orientation to work with the sketch. So I decided to work with what I had. The paper is so glittery and gorgeous that I didn't want to over embellish it too much. I used a piece of HOTP embossible paper inked with several inks to get the right shade/look for the background paper. It actually took me ages to get everything just right so it looked simple and thrown together! Makes it an easy one to recreate which is what I did below:


The main diecut background paper came home with me from the US of A and, again, didn't need a lot of other layers added to it. I pulled out my shoe box of black and white embellishments and played around until I was happy. I got to use some items I had stored away for a 'special' layout (including the paper). Moral of the story: don't wait for a photo/event/layout to be special enough to use stuff. The epoxy stickers on the edge of the photo block look like part of the layout design but they are also tags with additional photos and stories (as shown below the layout). I used up some of the leftover strips of the embossible paper on this layout too (inked with black ink).

Saturday, September 3, 2011

I Broke the Rules (again)


It is not unexpected that I have broken the rules (again) as I've never been good with them but this time I broke one of my own rules! The rule I broke was this one: if I made the present, you don't get a handmade card. I figure if I went to all the effort of making you a gift then I can be excused from making a card. Don't you remember me confessing that I hate making cards? Well, I made my mother a birthday gift and I made her a card as well. Even though I still do detest making cards I really like how this turned out. I finally got to use the MS Buttefly punch I purchased a while back - see, I knew it would come in handy, that's why I had to buy it :)

My Mum has the same recipe book I remember from my childhood as well as a newer exercise book she adds new recipes to and several old, battered, long out of print recipe books. There are pages falling out of all the books (looseleaf A4 photocopies, handwritten recipes, and pages ripped from magazines) and the ones that are still in the books are barely hanging in there by yellowing sellotape. Some still have their own covers but most don't. I decided to make her a recipe book using a ringbinder folder where she could store copies of all her tried-and-true recipes in an organised way as well as plenty of space for new recipes. My Mum is not an overly Fru-fru kind of lady so I kept the design very simple and matched it to her current kitchen colours.

I copied some of her most used recipes - ok, I admit it, the ones I like the most - and have placed them in the folder. I have created some labels and dividers for her and have included extras for her to use to her preferences (with adhesive already attached). I wouldn't mind one of these babies for myself now.


Thursday, August 18, 2011

I have an excuse


The blog isn't being updated because I am creating. Because the item I am creating is for a gift, I can't share it on here yet - besides it's not finished yet. I'll update you when it's done and dusted, after it has been given to the recipient of course!

Monday, July 25, 2011

What to do on a Cold Winter's Day?


Create, of course! This mini album was made from one sheet of 12x12" paper (except that I found out after I assembled it that the paper was a little shy of 12" - it still worked out and I'm not going to tell you where it went wrong and how I covered it). Here's the link to the site where I got pictures and instructions from: http://papervinenz.blogspot.com/2011/01/baby-mini-album-plus-tutorial-day-3.html
Scotties crafts is having a challenge where the theme is: use paper from your stash that is at least a year old - I've got plenty of that! I used a piece of paper from K&Co which is definitely more than a year old (but still good). I also used some K&Co tags and rub-ons, My Minds Eye papers and [old] expoxy stickers for the inside pages. My trusty photo corner punch got a workout as well - have you noticed how often I use it on my layouts? I decided to use the mini album I made and use pictures from our day at San Diego Zoo. I'm a fan of mini photos so off I trotted to Harvey Normans to save money on photo developing only to walk out with an external hardrive as well - hmmmm, how did that happen?
Here's the link to the Scotties challenge page: http://scottiecraftsnz.blogspot.com/2011/07/july-challenge-finally.html

Monday, July 18, 2011

A Card and A Freebie


Let's hope the recipient of this card isn't blog hopping, but then again, she is turning two so I think it's safe to share. My original idea was simply an excuse to use the [new-to-my-stash] mini rosette die from Tim Holtz with a large #2 in the middle. I remembered that the recipient is mad on ducks at the moment and is having a duck theme birthday - boy, I really hope she isn't reading this! I looked at all my punches and discovered that, although I have many of them, not one of them was a ducky. I knew none of my cricut cartridges had a duck on it because the Mum had already asked me (for the invites I think). I was pretty sure that amongst my entire stash I would find at least one thing ducky - and I did (while searching in my Girl/Boy/Childhood box for the base patterned paper - I knew I had that!). Unfortunately ducky was too big for the mini rosette so it had to be hand cut down to size (too thick for EK Success scallop circle punch it turns out!). I guess that means I have to buy the standard rosette size die now, right? Ducky also had the word "baby" on it which I didn't think Miss Two would like but luckily I could stick with my original intention of putting #2 on it strategically placed to cover most of the offending word.


Now, for the freebie. While I was blog hopping yesterday I came across a link for a scrapbook and card magazine website. The magazine is published for the Canadian and US market but international viewers can download the magazine in its entirety for free!
Enjoy!