This card utilises colouring texture paste with spray inks. I have done this technique before - sometimes successfully, sometimes not. This time it turned out well:
The video colours clear embossing paste but I only have white texture paste. If you use clear instead the white your depth of colour will be much stronger.
Materials: Stencil (Heidi Swapp), Texture Paste (Jo Sonya), Spray Ink (Smooch), Stamp (Stampin' Up!), Ink (Stazon), Paper, Card, Vellum, Flower.
Sunday, January 26, 2014
Stencilled - Day 3 - Card 1
This card uses texture paste - ok, it was supposed to be clear embossing paste but I don't have any - and embossing powder on top. The result is really cool! Loving the metallic stars.
Materials: Texture Paste (Jo Sonya), Stencil (Crafter's Workshop), Stamp (Mama Elephant), Embossing Powder, Paper, Ink (Stampin' Up!), Star brad.
All About the Elephant
No, this post is not about stencilling for a change. Instead, I created a card for the latest Mama Elephant challenge. Excuse me for gushing; but I really like this card. It is so soft, girly and frou frou which is so not my usual card making style.
I tried watercolouring for a change on the vellum and tissue. I also pink embossed on the tissue and tried the latest 'thing' of adding a dollop of random threads behind a focal piece. A littler glitter, a little bling, budda boom budda bing! Pretty no?
The challenge details are here.
So, it turns out this post is not just all about the elephant! I am entering this card in the Inspiration Emporium Dieing challenge : use a die or punch. This card definitely fits the bill as I used a heart punch on the right border. I am so glad they are doing challenges again - thanks Inspiration Emporium! The details for the challenge are here.
Materials: Stamps (Mama Elephant), Cardstock (Stampin' Up!, DCWV - glitter), Silver Thread (Stampin' Up!), Watercolour Set (Franchville), Vellum, Heart Punch, Ribbon, Tissue, Bling, Emboss Powder,
Saturday, January 25, 2014
Stencilled Class - Day 2 - Card 2
This card was watercolouring through a stencil. I had bought a cheap travelling watercolour set a while back and had never used it. I pulled it out and got to work. It was definitely cheap as there were many hairs from the brush on it by the time I was done but they blew right off when it had dried! I really like how this one turned out:
I liked the shattered stencil and added the stamp because it seemed to work with the idea of things falling apart! A little patterned paper on the sides and it was done.
Materials: Stencil (Tim Holtz), Stamp (Kaisercraft), Ink (Versafine), Patterned Paper (Creative Memories), Pen - for edging (Stampin' Up!), Watercolour set (Franchville)
Stencilled Class - Day 2 - Card 1
Sharing more cards from the Stencilled class. Lots of great ideas. This one is stamping through a stencil then inking the edges of large stencil shapes:
Confession: I stuffed up! See that dimensional mosaic piece? I had to add something there because I did one two many in my first row of stamping/shading! Mine is totally different to the sample as I had to work around this new design element :) I cut the mosaic from the masking paper I was using so it had some of the stamping and colour on it from the design - cool huh?
Materials: Stencil (Prima), Ink (Stampin' Up! & Versafine), Stamps (Mama Elephant & Glitz), Punch (Stampin' Up!), Daubers,
A is for Aunty Time
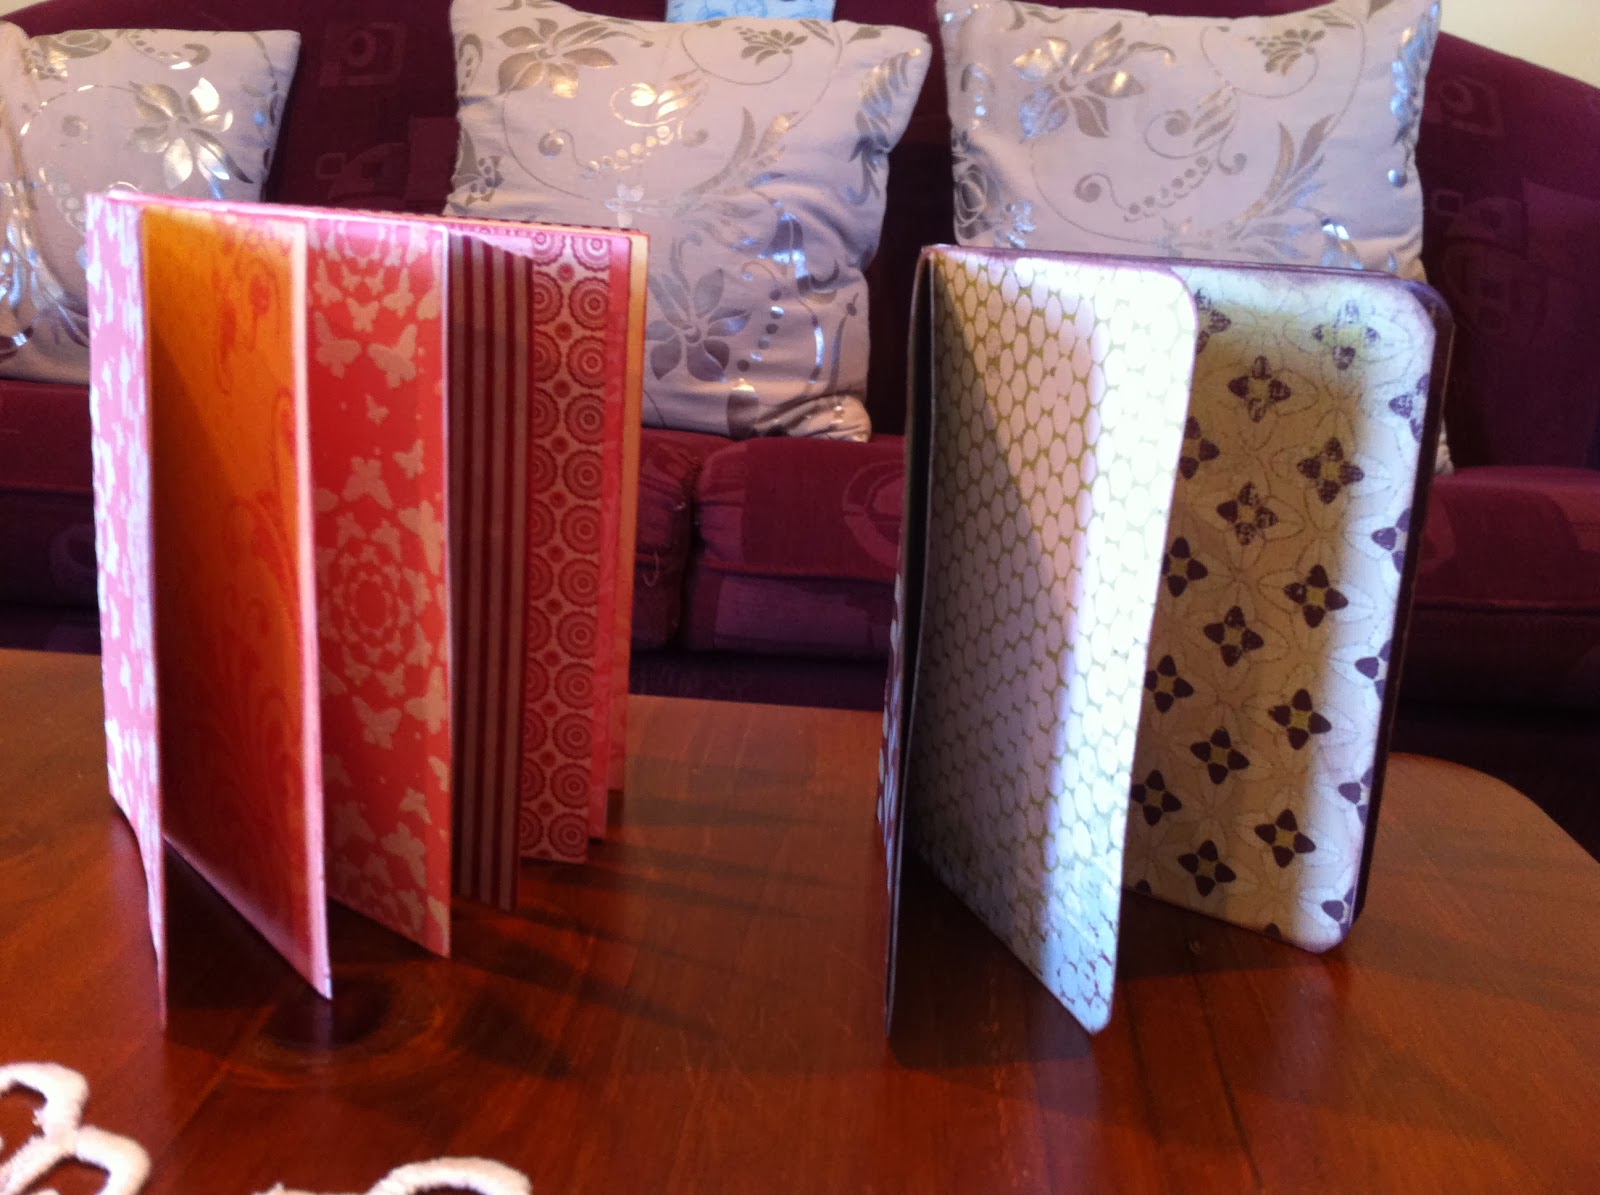
It is school holidays here in New Zealand and we have had my wonderful niece with us a few days a week. On Friday we made books together. I saw the idea on Heidi Swapp's blog this week and they were presented by: Maggie Massey. They were easy to make and here's what we came up with:
Mine was made with thin paper and so my book is much thinner and less sturdy than my niece's. She used DCWV paper which is nice and thick. The embossed paper took a bit of pressure to cut through though. Here's the inside pages:
My niece did really well and I am proud of her. I know that creating is 'my' thing and that doesn't necessarily mean it has to be 'her' thing but I enjoyed sharing my time, skill, tools and stash with her. When she was little she would always make cards for her parents and friends but that dropped away a few years ago. As a teenager there are far more interesting things to do like play on Aunty's Ipad (yes, she has her own folder on my Ipad). Aunty time is very important (to Aunty) and I am pleased that my girl still thinks her Aunty is cool.
I am entering these books on Simon Says Stamp Monday Challenge which is: A is for..... My A is for Aunty Time! The challenge details are here.
Materials: Paper (DCWV, MME) , that's all folks!
Stencilled Class - Day 1 - Card 2
This is the second card I made from the videos. The stencil the teacher used was heart shaped. I only have standard square ones but I got out a scrap piece of paper and hand cut a heart shape to use as a mask - pretty ingenious if I do say so myself!
Second card was inking with versamark then clear embossing and inking over that.:
I tried to use as much Tim Holtz distress ink so I could add droplets of water as suggested in the video. Sorry about my blending - it had been a long day and my arm was too sore to continue to blend it until it was perfect. The tutor was right: you do get sore fingers from holding the blending tool and adding so much pressure to your work!
Subscribe to:
Posts (Atom)